Tutorial: How to make photo notecards

Today we are featured on the Fall Crawl and present this tutorial:

This tutorial describes how to make photo notecards out of regular letter size photo paper.

What do we need?

  • An inkjet printer, pretty much any newer model will do, regardless whether is says “Photo” or not in its name. For the tutorial here, I will use an inexpensive printer from a manufacturer that starts with an E…, but I heard that printers from H… or C… produce excellent output as well.
  • Letter size (8.5″ x 11″) matte photo paper. Glossy photo paper is not suitable for this project, because it is usually not possible to write on the back of glossy photo paper. Matte photo paper usually has a paper back and works fine. We need a paper on the back to write on the inside of the notecard later.
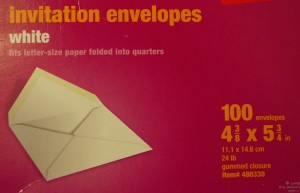
  • Invitation envelopes 

The final note-card size (folded) is 4.25″ x 5.5″, perfect for invitation envelopes. This envelope size is readily available in the office store that has a red logo and starts with S…

  • Cutter knife, ruler, cutting mat: to cut paper stock (and not your fingers!)
  • Bone folder: alternatively a dull knife may work as well

The idea

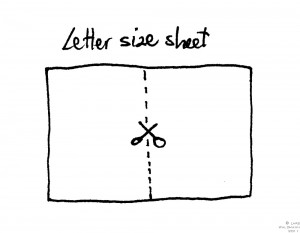
1. We will cut the letter size sheet of photo paper in the middle:

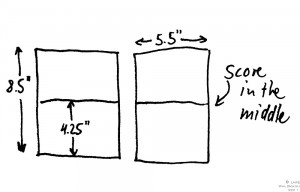
2. We will score the middle of the two half-letter size sheets and fold them in half:

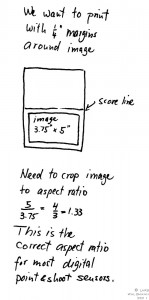
3. We print on the sheet with a 1/4″ margin all around the photo:

For most programs it is easier to print when the photo is cropped to the right aspect ratio, although photos from some cameras already have the right aspect ratio. Images from digital SLR (DSLR) cameras have an aspect ratio of 1.5 and will require cropping.

The actual process

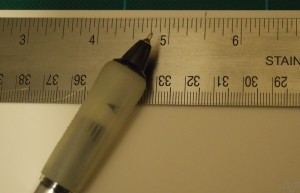
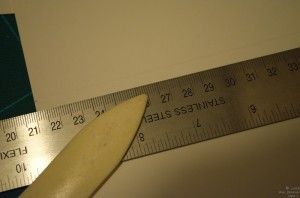
1. Marking the middle of the letter size matter photo paper sheet with a light pencil mark (5.5″ from edge to edge).

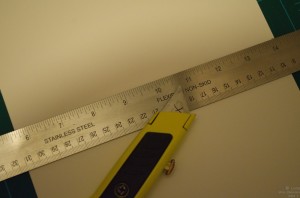
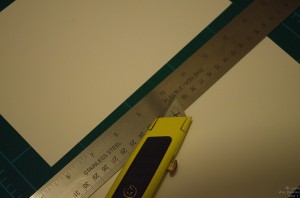
Cutting of the sheet in half, before and after successful cutting. (No fingers were harmed in the cutting of this sheet.)

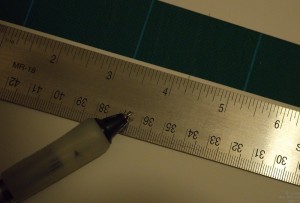
Marking the half-sheet for the scoring in the middle (4.25″ from edge to edge.)

After scoring of the paper (a dull knife, letter opener, key, screwdriver, etc. may work fine)

The folded cards, ready for printing

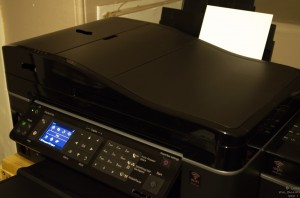
Unfolding the cards and loading them into the printer

Preparing of the photos for printing

For the next steps, I will use the Faststone Image Viewer, a great freeware image viewer and simple editing program for Windows available at http://www.faststone.org. Of course other image editors will work fine, I just like to use freeware programs as much as possible.

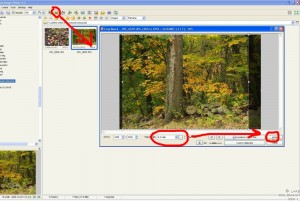
For the example here, I am using a photo from a DSLR and need to crop it to the 4:3 aspect ratio first.

After clicking on the crop icon I can set the aspect ratio to 4:3 and decide how to crop my photo.

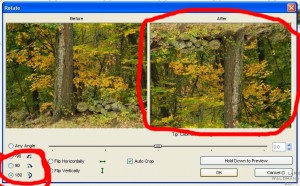
The next step is very important: we need to rotate the photo 180° to print in the correct orientation. Again, in Faststone Image Viewer it is very easy to do.

After saving the photo, we are ready to print it. For printing, I am using Corel Paint Shop Pro X3 (which is not freeware), because I had some problems with Faststone Image Viewer to accept my custom paper size.

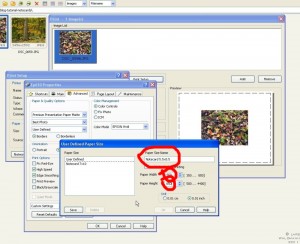
We first need to define the custom paper size of the note-card, which is 5.5″ wide and 8.5″ tall.

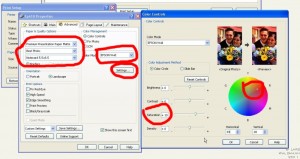
To finalize the settings, I pick “Premium Enhanced Photo Paper” or something like that, and the highest quality setting. I also like to push saturation a little bit, and set a slight hue bias. Again these settings work fine for my particular E… printer, your setup may be different.

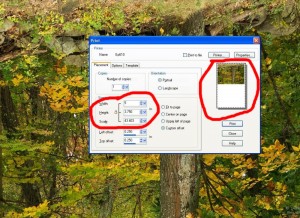
Now I am ready to (finally) print the photo. In the print setup screen, I select a custom margin of 1/4″ on the top and left, and then set a width of 5″ for the image size, because the aspect ratio has been cropped to the correct ratio, the height shows up correctly as 3.75″.

After I can finally click on the “Print” button, the printer is finally printing. One last check of the printer status message shows that the paper size has been recorded correctly.

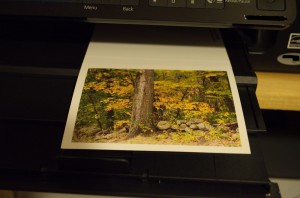
After a minute or two, the printed notecard emerges from the printer.

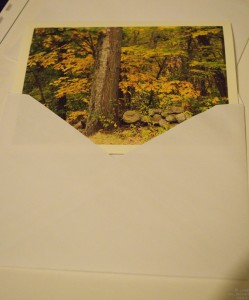
Now we only need to fold it, and stick it into the envelope until it is used.

Now that you have made some notecards, you can give them away as gift, or use them as personal notecards instead of store-purchased notecards.

Of course you can also save yourself a lot of work and just purchase notecards from our store (http://larskim.com/?wpsc_product_category=photo).

About creativity and Fall Crawl Day 5

As part of the Fall Crawl we will stop by Abby’s blog today at http://dirtontherocks.com/. Abby shares a multitude of different life experiences on her blog, highly recommended.

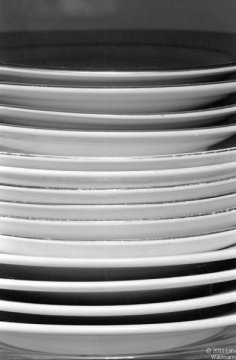
As the title says, I wanted to write a little bit about creativity. Lately I really enjoy b&w abstract photography, because certain patterns or textures stand out and stand out differently in b&w instead of color. This got me thinking about how others point out “creative” or “artistic” individuals as some who were somehow born with the gift of artistry. Yet at the same time, there are classes in painting, drawing, or photography available. This implies that arts can somehow be learned after all.

To confuse matters further, the term “crafts” is also used sometimes interchangeably with “arts”. We talk about “good craftsmanship” of a building for example.

The apparent contradictions are resolved by establishing two layers of function to art: on one hand the “mechanic” aspects of an art form exist such as applying brush strokes to paper, or setting the camera correctly for the next exposure. This level of mechanic proficiency is often seen as “craft”. To mature as artist, the craft aspects are first practiced consciously, and then subconsciously. Most of us have experienced a similar process when we learned to drive. We first had to pay a lot of attention of how to accelerated or brake the car. After a while it became second nature. The understanding is that we store certain processes in the cerebellum, and thus they become “second nature”. Similar to learning how to accelerate and slow down the car we need a similar comfort level with our tools in the arts. In photography it needs to become second nature what settings to put in the camera, so we can focus on what we want the photograph to be about.

But what has all of this to do with creativity? Well, our tools are just that – tools. It comes down to what we want to say using our artwork. People who have something to say are seen as “creative”, because their art work resonates with other people’s life experience, yet appears unusual and refreshing from their perspective.

I oftentimes feel that my interest (or obsession) with photography helps me in my day job as a scientist to be “creative” when it comes to understanding data or solving problems. Of course when we analyze data, we look for patterns – big surprise, in photography we look for patterns as well.

I created the photograph for today’s post on a rainy Sunday afternoon at home, when I suddenly noticed a lot of patterns in our dining room.

And one more thing: while we call our blog “Crafts and Photography”, my wife Kim’s “crafts” are very artistic and I know she is an artistic and creative person.

Alewife Station – and Fall Crawl Day 3

Northwest of downtown Boston is Alewife Station (in Cambridge), the Northern terminus of the Red Line (yes, we got color-coded subway lines). Recently I had some extra time on my hands while waiting for the next bus…


Today is Day 3 of the Fall Crawl. Please stop by Letty at http://bellavidabyletty.blogspot.com/. Her pumpkins are just amazing.

Thanks for stopping by.

Confusion about cameras and other equipment

What a great camera!” I first heard this at a friend’s wedding over ten years ago. At the time I was one of the (back then) few people who were using digital cameras. I had just captured the bouquet toss of the bride mid-air, when somebody attributed it to my camera gear.

When photography became available to the masses, there was always a focus on the mechanical aspects of it. Clicking the shutter seems so simplistic and mechanical. The issue arises because photography has may different uses, one of which is its use as artistic medium.

Even those of us who use photography for artistic purposes get confused at times about the role of our equipment. Most of us who use digital cameras get trapped in the “upgrade hamster wheel”, where we feel we constantly “need” the latest cameras to be able to make outstanding photographs. Photographers are probably the only visual artist who fiercely discuss merits of equipment.

When I thought about the role of equipment, I noticed that…

  1. The well-known famous photographs by past photographers were made with cameras most people wouldn’t even touch today, because they would be considered so simple. Yet the idea in those photographs is what transcends into our time, and we don’t really care what process the photographer used at the time.
  2. Nobody (except maybe some serious pixel peepers) can look at an image and tell that it was taken with a “substandard five year old digital camera”. Or to put it differently, it is better to make a great image with an older camera, than to make an insignificant image with the latest equipment.
  3. Digital cameras are marketed as electronics and follow the same patterns as other electronics. Marketing pushes new products onto us constantly with insignificant new features, although most of us don’t use all the features of our current products.
  4. We are about to reach market saturation for digital SLRs. This means that manufacturers may slow down their product cycles, and we may see longer time periods between releases of new products and more significant added features between products.
  5. Most people that have a halfway decent SLR body get more value out of a new lens than a new camera body. Most people do not make better images because their digital SLR sensor has higher resolution, but instead with a new lens that adds new capabilities.
  6. Prime lenses (fixed focal lenses) instead of zoom lenses still offer a lot of advantages, mostly in light sensitivity and weight.
  7. Not everybody needs a high resolution camera, unless images are frequently enlarged. Of course there are workarounds like stitching images, or using medium or large format film and cameras when high resolution is required.
  8. It is oftentimes better to have a less valuable camera that can be taken everywhere than to use an expensive camera that stays at home because of fear of getting stolen or damaged.
  9. We oftentimes think about buying a new camera body to get a change in pace and think this will improve our photographs. Instead it may be better to spend money on accessories that give us new capabilities, for example: inexpensive studio lighting kit (2-3 light stands, umbrellas, monolights, or continuous lights), battery-operated multi flash kit, inkjet printer to print your own work, macro lens, extreme wide-angle lens, underwater housing for camera, compact tripod for sharper images in the field.
  10. Before we can create art, we need to master the technique (or craft) of photography. When we arrive at this stage, using the camera becomes second nature and is controlled subconciously. To get there, we need to practice every day. Then we can focus on the image, how it makes us feel, what we are passionate about, whatever camera we are using.

Thank you for reading. I appreciate your thoughts and comments.

Lars Waldmann